
BACK TO BASICS

One of the great benefits of my job is that I get to look toward new technology, but sometimes we need to be reminded that not all computer users have the same skill set. Our clientele varies from folks who are learning to navigate email and the web, to business professionals who rely on their computers day in and day out. This fact is also what makes this business so interesting. Since school starts this month, it is the perfect time to introduce a new section to this newsletter: "Back to Basics". I hope you like it!
THE FINDER - WHAT IT CAN DO FOR YOU!!
The Finder starts up automatically when you first open your computer - its interface encompasses your desktop, the menu bar and the dock among other things.

The smiley face icon appears in the dock and all your desktop files appear. Within a few more seconds, any extra programs that need to start up do so and sometimes their icons appear on the Apple Menu bar or in the dock. When I teach classes I tell my students to think of the Finder as their secretary.
It can open a window, create a folder, file that folder, and take out or empty the trash. But it can do so much more! (This article is excerpted from Apple's Knowledge Base.)
Open Windows and Files
To open a window and see the files on your Mac, switch to the Finder by clicking the Finder icon (pictured above) in the Dock. Switching to the Finder also reveals any Finder windows that might be hidden behind the windows of other apps.
When you see a document, application, or other file that you want to open, just double-click it.
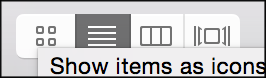
L - R: icon view, list view,
column view or cover flow
Change how files are viewed in windows
Once a window is open, you can decide how to view the files that appear. If you prefer to view your files as an alphabetical list instead of as icons, choose View > as List from the Finder menu bar, or use the View buttons at the top of the window.
Use the Sidebar in Windows
The sidebar in Finder windows contains shortcuts to some of Apple's recommended options, your Favorites, devices such your hard drives, and more. Like items in the Dock, items in the sidebar open with just one click.
To change the items in your sidebar, choose Finder > Preferences from the Finder menu bar, then click Sidebar at the top of the preferences window. You can also drag files into or out of the sidebar.

USE FOLDERS
To Create a folder:
- Click where you want the folder to appear, such as on the desktop or in another window.
- Choose File > New Folder from the Finder menu bar.
- This works for folders, not documents. To create a document for use in a particular app, open that app, then use its File menu to create a new document.
To move a folder or file into another folder:
- Drag the item onto the closed folder.
- Or double-click the folder to open it, then drag the item into the folder window.
To change the name of a folder:
- Click the folder once to select it.
- Press the Return key on your keyboard, type a new name, then press Return again.
Some folders can't be renamed including these:
- Applications: Your apps (programs) go in this folder.
- Desktop: Your Desktop folder and your desktop provide two ways of viewing the same files, so anything that you put in the Desktop folder also appears on your desktop.
- Documents: When you use an app to create and save a new document, the app might save your document here. You can save documents wherever you want, or move them to other folders after saving them.
- Downloads: Safari and other apps save downloaded files to this folder.
- Music, Pictures, and Movies: Some apps store their libraries of music, pictures, or other media in these folders, though the items in a library might be available only within its app. For example, to see the pictures or movies you imported into Photos, open the Photos app.
- Other folders that come with your Mac
TECH TIPS
MAC OS: Print to PDF
I often get asked how to share a document created on a Mac with others OR how to create a printout of a web page or other hard to print item. Apple has provided the solution via the Print to PDF option available right in the Print dialog:
- Open the document, web page, or file you want to print to a PDF
- Click the File menu and select "Print", or just hit Command+P
- Look for the "PDF" button in the lower left corner, click on that pull-down menu, and select "Save as PDF"
- Click "Save" in the save dialogue box, and save the file to whatever location you want (Documents is default).

Locate the resulting document in the Finder or with another app; it'll appear as a unique PDF file, and no, it will not overwrite or alter the origin file it was created from. You will notice there are many other options (what you see will vary based on installed software).
What I love most about this method is that if you are trying to print something like a web page that isn't behaving, once you turn it into a PDF you can then choose what pages to actually print OR even better, simply store the PDF on your computer and save ink and the trees! Try it and let me know how you like it!
iPhone / iPad Tip- from newsletter reader Dick G:

Dick travels a lot and needs to take his medications with him - this is a great solution to how to carry all your medication documentation in a compact format (I'm quoting Dick below):
- I just used an Aspirin bottle to illustrate here but a prescription bottle, properly framed in the viewfinder and held steady will yield a perfectly useful copy of the important information on each prescription product you use.
- You could also email that photo to a pharmacy if that became necessary. I also photograph the actual document that comes with the prescription. On my iPod phone it is secure and very convenient.
NOTE: A big issue is to properly frame and focus the camera on the close up exposure. It is pretty simple. This was a flash exposure taken on a piece of printer paper for a background. I sense that officials are becoming more concerned for traveling with meds without proper accompanying prescription documentation.